Are you looking to get the most out of your TO Shiba SmartKit OSK102? Whether you’re new to this device or looking to optimize its performance, you’ve come to the right place. In this blog post, we’ll explore what the TO Shiba SmartKit OSK102 is, how it works, and why it’s becoming a popular choice for tech enthusiasts and DIY project lovers.
By the end of this article, you’ll have a clear understanding of how to use the TO Shiba SmartKit OSK102, its key features, and how it can fit into your next tech project. Let’s dive in!
What is the TO Shiba SmartKit OSK102?
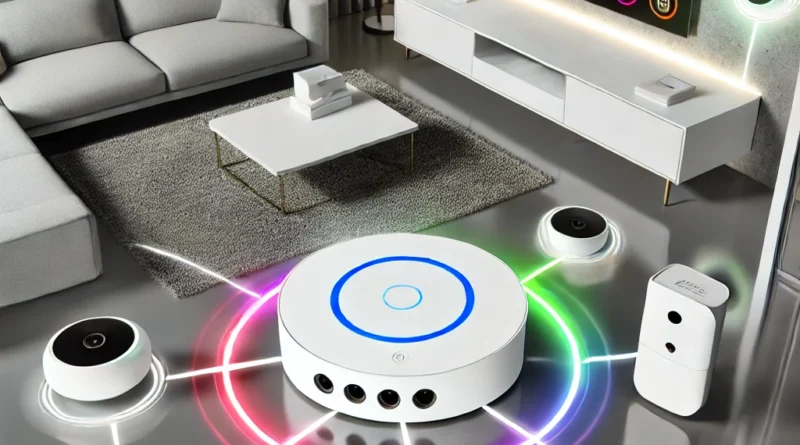
The TO Shiba SmartKit OSK102 is an all-in-one toolkit designed for both beginner and advanced users looking to work with smart devices, sensors, and electronics. It offers a range of components and accessories to help you get started with your projects, from robotics to IoT (Internet of Things) applications.
At its core, the SmartKit OSK102 is a flexible, open-source platform. It gives you the freedom to build and experiment with different smart systems, whether you’re designing a home automation system, a robotic arm, or a sensor-based monitoring system. The OSK102 is built to be easy to use, even for those with little to no experience in electronics or coding.
Key Features of the TO Shiba SmartKit OSK102
The TO Shiba SmartKit OSK102 comes with a variety of components that make it a powerful tool for building and experimenting with different electronic projects. Here are the main features you can expect from the kit:
1. User-Friendly Interface
- The SmartKit OSK102 is designed for ease of use, with a simple interface that’s perfect for beginners. It includes clear instructions and tutorials that guide you through each project step-by-step.
2. Wide Range of Components
- The kit includes various sensors, actuators, and microcontrollers, such as:
- Temperature Sensors
- Motion Sensors
- LED Modules
- LCD Screens
- Microcontrollers (compatible with Arduino and Raspberry Pi) This wide range of components allows you to create a variety of projects that are both educational and fun.
3. Open-Source Compatibility
- The TO Shiba SmartKit OSK102 is compatible with open-source platforms like Arduino and Raspberry Pi. This makes it easy to access a vast library of resources and projects online. You can modify your projects, upgrade components, and even share your creations with the global maker community.
4. Flexible and Expandable
- The kit is designed to be scalable, meaning you can add more sensors, modules, or actuators to your project as it evolves. The system is also compatible with many third-party devices, making it ideal for advanced users who want to build more complex setups.
5. Affordable and Accessible
- Compared to other similar kits, the TO Shiba SmartKit OSK102 is affordable and provides excellent value for money. It’s a great starting point for anyone who wants to dive into the world of electronics and smart technology without breaking the bank.
How to Use the TO Shiba SmartKit OSK102
Getting started with the TO Shiba SmartKit OSK102 is easy, and you don’t need to be a tech expert to begin building your projects. Here’s a simple guide on how to start using the kit:
Step 1: Unbox and Set Up the Components
Start by unpacking the kit and making sure all the components are there. The kit usually includes a microcontroller (like an Arduino board), a breadboard, and various sensors. The first thing you should do is set up your microcontroller and ensure it’s ready to connect with your computer.
Step 2: Connect the Sensors and Actuators
Next, you’ll want to connect the sensors and actuators to the breadboard using jumper wires. The instructions provided in the kit will show you how to connect these parts. For example, if you want to create a temperature-sensing system, you’ll connect a temperature sensor to the breadboard and wire it to the microcontroller.
Step 3: Write and Upload Code
Once your hardware is set up, it’s time to write some code. If you’re using an Arduino-based microcontroller, you’ll use the Arduino IDE to write and upload the code. The kit comes with sample code to help you get started. Don’t worry if you’re new to coding—there are plenty of online resources and tutorials that will guide you through the process.
Step 4: Test Your Project
After uploading your code, it’s time to test your project. For example, if you’ve set up a temperature sensor, check to see if the reading on the display matches the actual temperature in the room. If everything works, congratulations! You’ve successfully completed your first project.
Step 5: Expand and Experiment
Once you’re comfortable with the basics, start experimenting with new sensors and projects. The TO Shiba SmartKit OSK102 is highly flexible, so you can build anything from home automation systems to simple robotic applications.
Why Choose the TO Shiba SmartKit OSK102?
If you’re wondering why you should choose the TO Shiba SmartKit OSK102 over other similar kits, here are a few reasons:
Affordable Pricing
- Compared to other smart kit solutions, the TO Shiba SmartKit OSK102 is very affordable. It provides great value for both beginners and advanced users.
Wide Range of Applications
- The kit is versatile and can be used for a wide variety of projects, including home automation, IoT, robotics, and more.
Great Learning Tool
- Whether you’re a student, a hobbyist, or just someone looking to learn more about electronics, the TO Shiba SmartKit OSK102 is a fantastic learning tool. It’s user-friendly, well-documented, and comes with plenty of tutorials to guide you along the way.
Open-Source Compatibility
- The open-source nature of the TO Shiba SmartKit OSK102 allows you to access a wealth of community support. You can find online resources, examples, and advice that will help you complete your projects with ease.
Conclusion: Start Your Smart Project with the TO Shiba SmartKit OSK102
The TO Shiba SmartKit OSK102 is a fantastic toolkit for anyone looking to dive into the world of electronics, smart technology, and DIY projects. It offers the perfect balance of ease of use, flexibility, and affordability, making it a great choice for beginners and advanced users alike.
With its range of components, open-source compatibility, and excellent support, you’ll be able to create everything from simple sensors to complex automation systems. So, if you’re ready to kick-start your next project, the TO Shiba SmartKit OSK102 is waiting for you!
FAQs About the TO Shiba SmartKit OSK102
1. What is the TO Shiba SmartKit OSK102?
The TO Shiba SmartKit OSK102 is a comprehensive toolkit that includes various components like sensors, actuators, and microcontrollers, designed for building smart electronics projects.
2. Can beginners use the TO Shiba SmartKit OSK102?
Yes, the TO Shiba SmartKit OSK102 is designed to be beginner-friendly. It comes with clear instructions, tutorials, and sample code to help you get started.
3. Is the TO Shiba SmartKit OSK102 compatible with Arduino and Raspberry Pi?
Yes, the TO Shiba SmartKit OSK102 is compatible with both Arduino and Raspberry Pi, which opens up a wide range of project possibilities.
4. What types of projects can I create with this kit?
You can create various projects, including home automation systems, temperature monitoring, robotics, and IoT applications.
5. Where can I find additional tutorials and resources?
You can find tutorials and resources on the official website, as well as on platforms like YouTube and various electronics forums where community members share their projects.